
Business Setup
When your account is activated as a Tenant you will receive a prompt when opening the app to setup your Business Profile. This business profile is used to display information to your clients about your location, services and pricing. During this process you will also be able to import your client list and send your clients invitations to start using the app to interact with you.
Step 1 - Basic Information

- Business Name: the name you use to trade with your clients, generally your 'doing business as' name
- Suite: the actual suite number you occupy within the salon
- License: your State license number
- State: the two digit code for the State where you are licensed
- Expiry: the expiry date for your license
- Custom URL: the text you would like to appear before '.salonsuitesolutions.com' when advertising your business. This is a web page we provide for you to promote your business and use of the app. Make it something easy to type that reflects your business name.
- Profile Picture: the picture you select will be displayed in your profile within the app and on your custom page. You may take a new picture with your camera right now or upload a photo from your mobile platform's currently library. You must allow the app access to your photo library, or camera, to proceed.
Click CONTINUE once you are happy with the above entries. You may edit this information later via the app.
Step 2 - Biography
- Bio: enter a description of your business. This bio appears with your profile in the app and is displayed on your custom web page. Recommended information includes how long you have been in business and your primary skill set.
Click CONTINUE once you are happy with your bio. You may edit this information later via the app.
Step 3 - Operating Hours
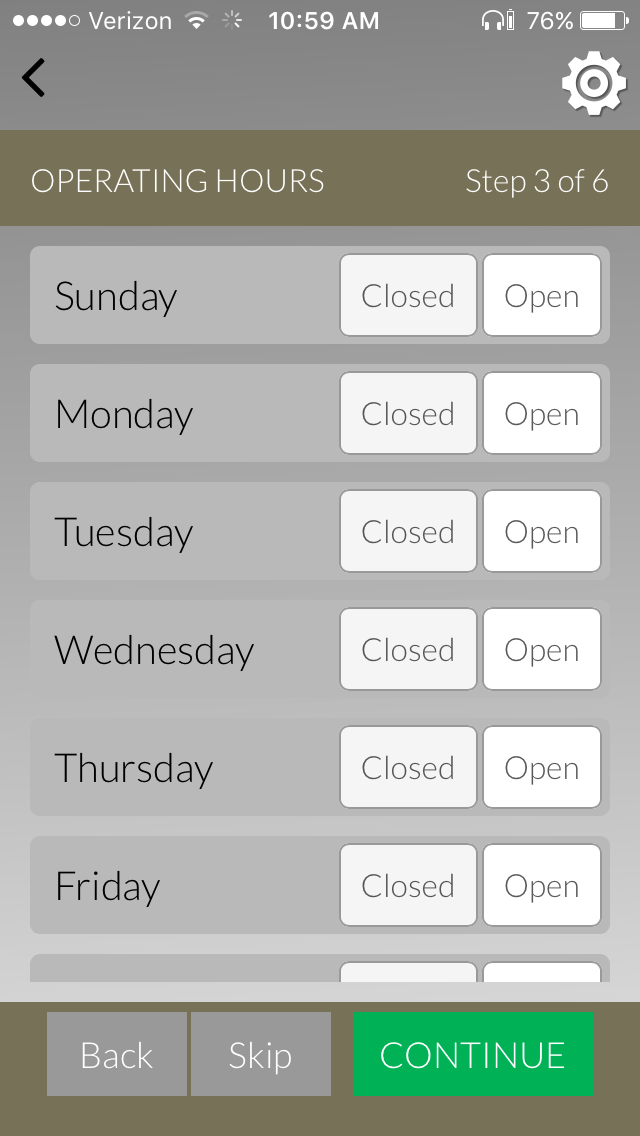
Enter the open and close times for each day you are available to set appointments. For each day you may set a different open and close time. If you are open during the lunch hour be sure to select open on the Lunch line. WHAT IS LUNCH?
Step 4 - Services
- Sales Tax: Are you required to collect sales tax on your services? If so enter the total percentage here so it can be automatically calculated at checkout.
- Header: Add information that will go at the top of the service offering page. For example, an overall general explanation of your services. Individual services to be selected will be entered below.
- Footer: Add information that will go at the bottom of the service offering page. For example, any guarantee information.
- Type of Services: select the broad categories of services you provide. You may select more than one service.
Click CONTINUE once you are happy with the above entries. You may edit this information later via the app.
Step 5 - Service Offerings
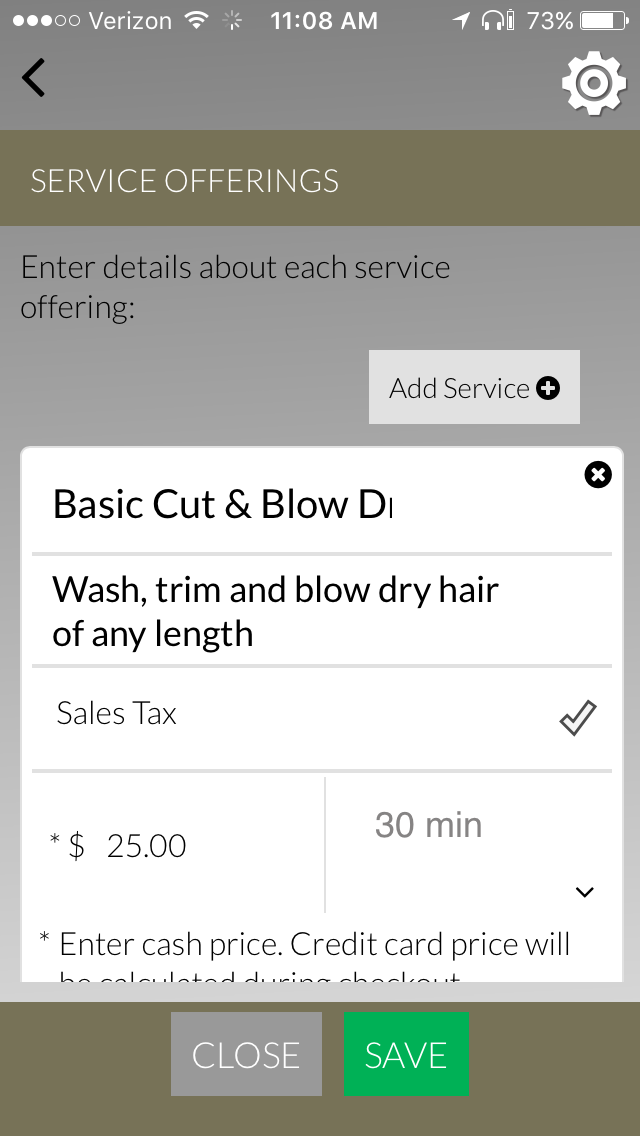
Add a service for each individual charge you apply to a customer.
- Name: the name of the service, for example hair cut
- Details: service details such as what the service includes
- Sales Tax: check this box if the service is taxable
- Cash Price: enter the base amount you charge for the service. Be sure to include zeros for the cents if the charge is a whole dollar figure, i.e. 25.00 not 25.
- Time: select the length of time it takes to perform this service
Use the Add Service button at the top of the screen to add multiple services. Repeat as necessary. Click CONTINUE when done. You may add more services later via the app.
Step 6 - Add Clients
Clients may be automatically added from your phone contact list or added manually. It is also possible to add clients by providing a list to your Salon manager for import via the PMS interface.
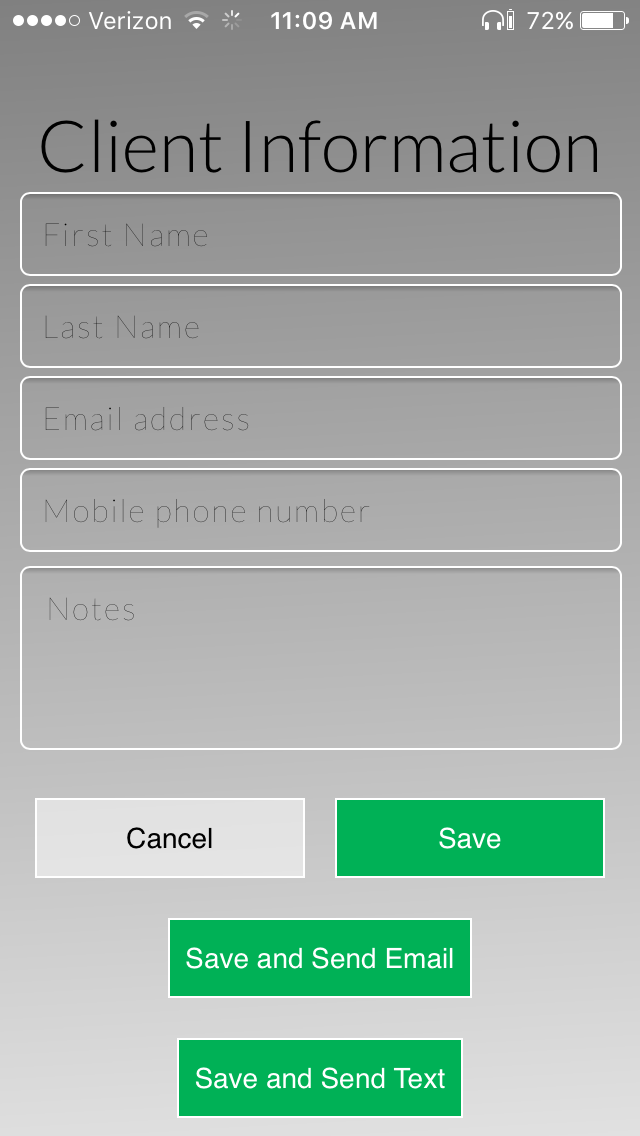
Add Clients One at a Time
To add clients manually click the add + button:
- First Name: the first name of the client
- Last Name: the last name of the client
- E-mail Address: the e-mail address of the client where they would like to receive app notifications
- Mobile Phone Number: the mobile phone number of the client where they would like to receive app notifications
- Notes: your personal notes on the client. This is a good place to put preferences.
Use the Save button to add the new client to the app without further action. If you would like to immediately invite the client to start using the app use the Save and Send Email button to send them an e-mail invitation or the Save and Send Text button to send them a text invitation. The invitation will include a link to download the app to their phone.
Import Clients
To add clients via an import from your phone click the import + button and allow the app to access your contacts:
- Your contact list will load. Click the Import button next to each client you would like to import.
- Confirm the client information.
Use the Save button to add the new client to the app without further action. If you would like to immediately invite the client to start using the app use the Save and Send Email button to send them an e-mail invitation or the Save and Send Text button to send them a text invitation. The invitation will include a link to download the app to their phone.
Click the FINISH button once you are done entering clients.
You are now ready to begin running your business from the S3 Mobile App.